Growing up, my parents didn’t always buy us the latest gadgets just because they were new. We had all the necessities with no problem, but if I wanted something just because i wanted it and not because it was for school or to survive, I had to either buy it myself or build it. I’m pretty thankful for this because I still maintain the same attitude when I want things that I don’t actually need.
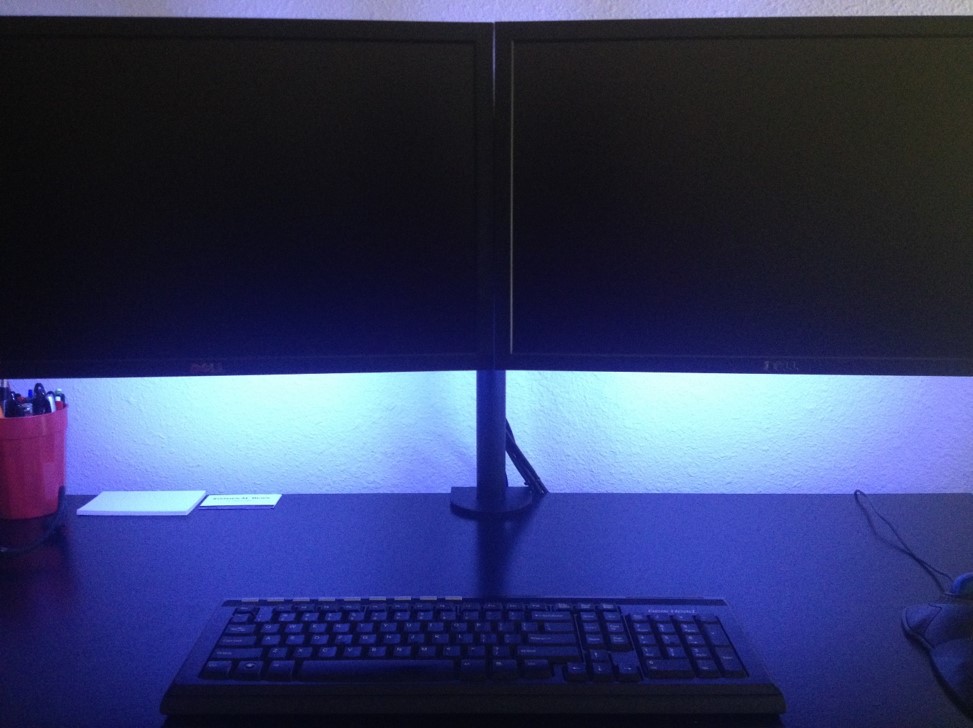
With that being said, as I’ve been getting things ready for my Youtube channel (which will be launching July 30th) I realized that I needed an LED ring light to get good shots like the one below. I got on Amazon and priced them and realized that the average price of them is around $120. Since I had already purchased a tripod, GoPro, and a bunch of other accessories, I decided I would try to be cheap with this one.
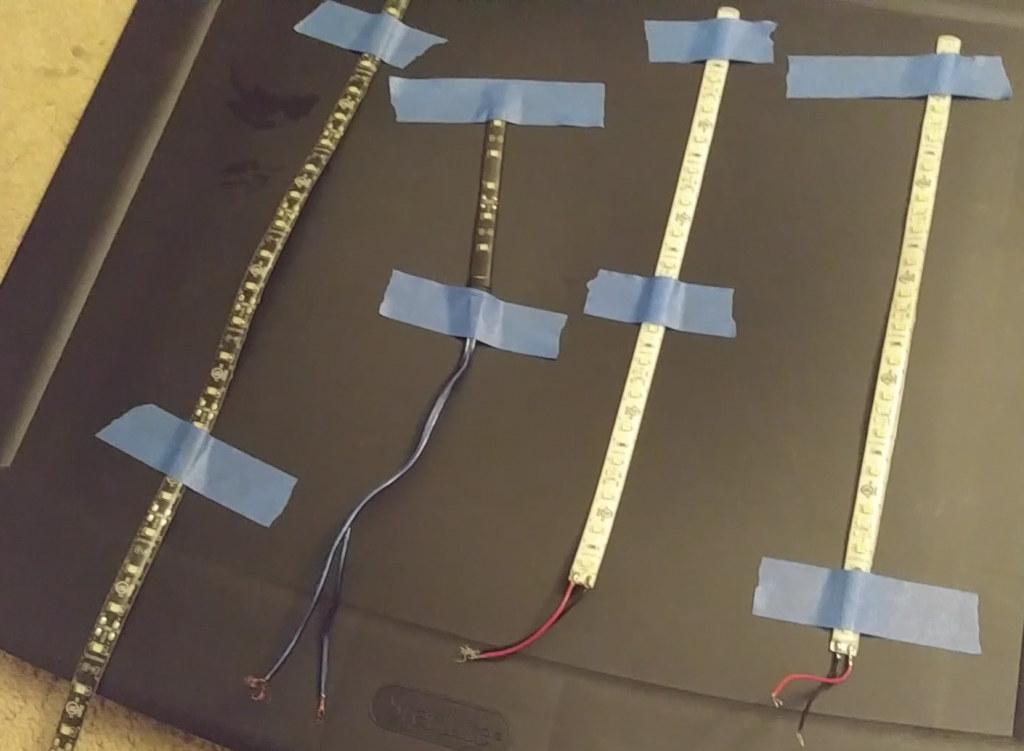
I do a lot of projects with LEDs, (See article 1, article 2) so I have a good deal of leftover supplies from previous projects. I checked my junkbox as usual and decided that this project was one that I could piece together using old parts. I found a few strips of natural white LEDs and tested them to make sure they were all working.
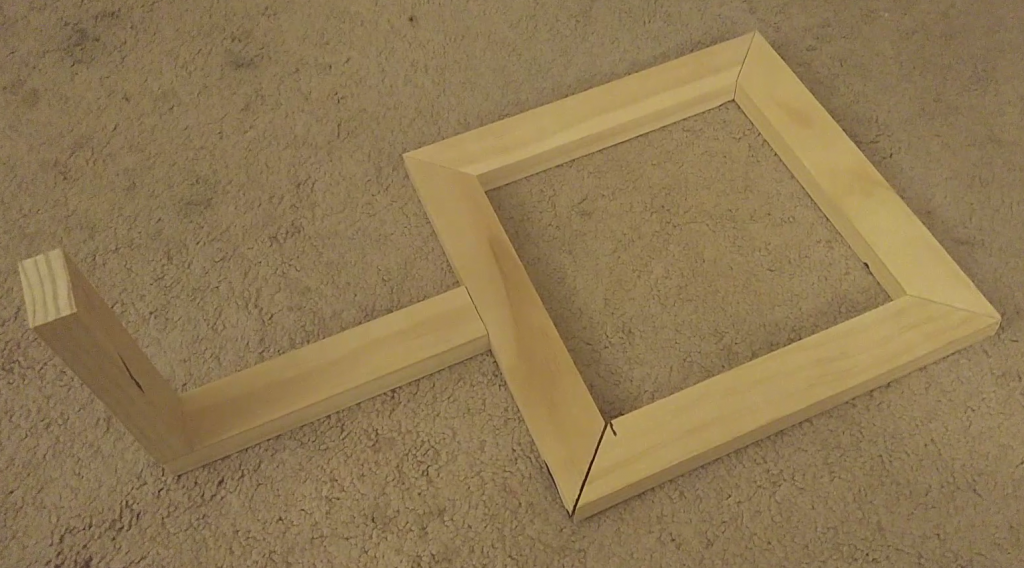
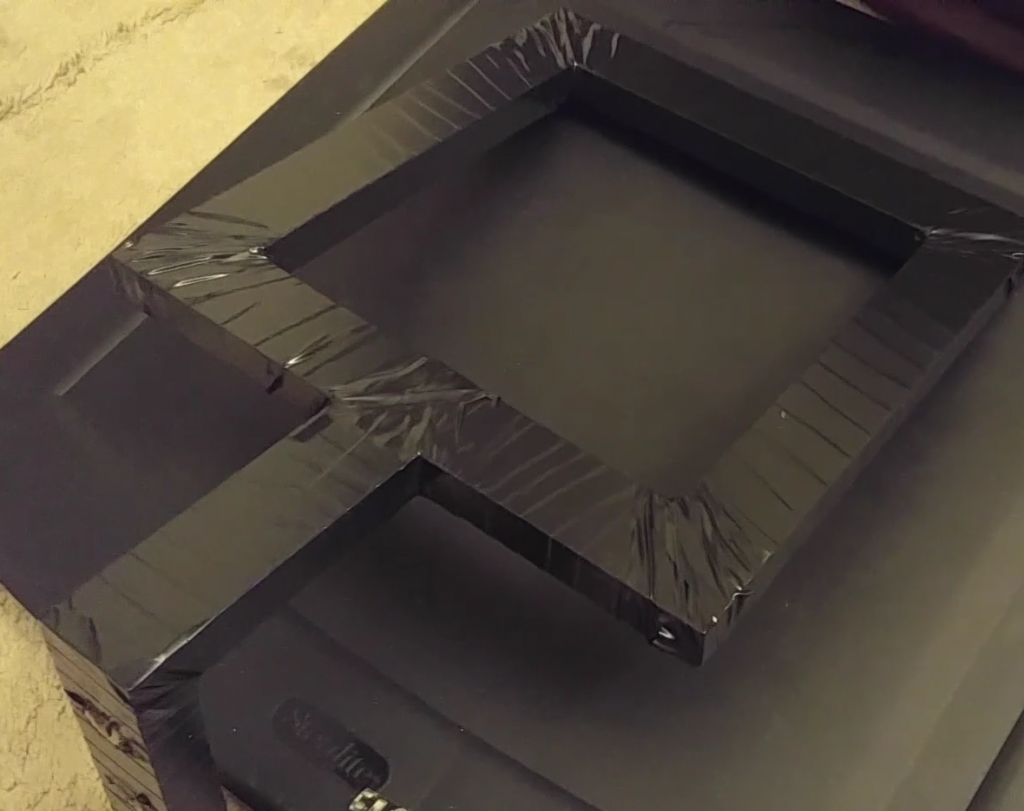
Once I found enough, I moved on to thinking about a frame. Since the goal of this project was to be as cheap as possible, I used some old wood I had laying around from a canvas I built a few months back. I cut it to equal lengths and used a miter box to get 45 degree angles for a perfect square. I nailed the pieces together and the frame was ready. I then added a few more pieces to the bottom to act as a mount on the tripod.
Once I had the basic setup of the frame complete I covered the entire thing in electrical tape, since I have an abundance of it, and to give the unit a more finished look.
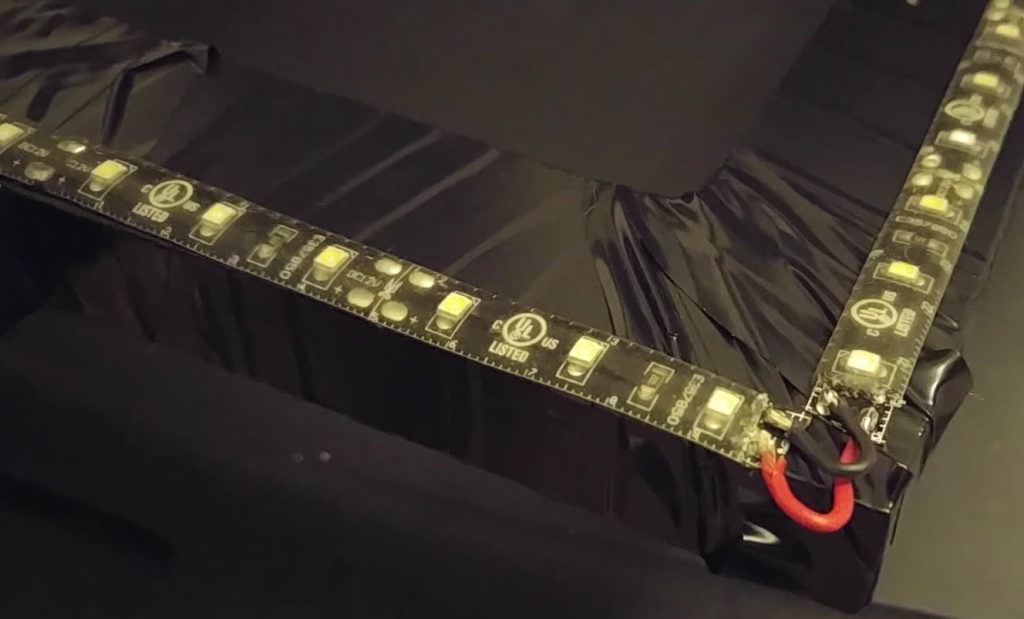
Next I placed the LED strips on the frame using the adhesive already attached to them. Most flexible LED strips can be cut as designated points on the strip to get the exact length required so they were a perfect fit.

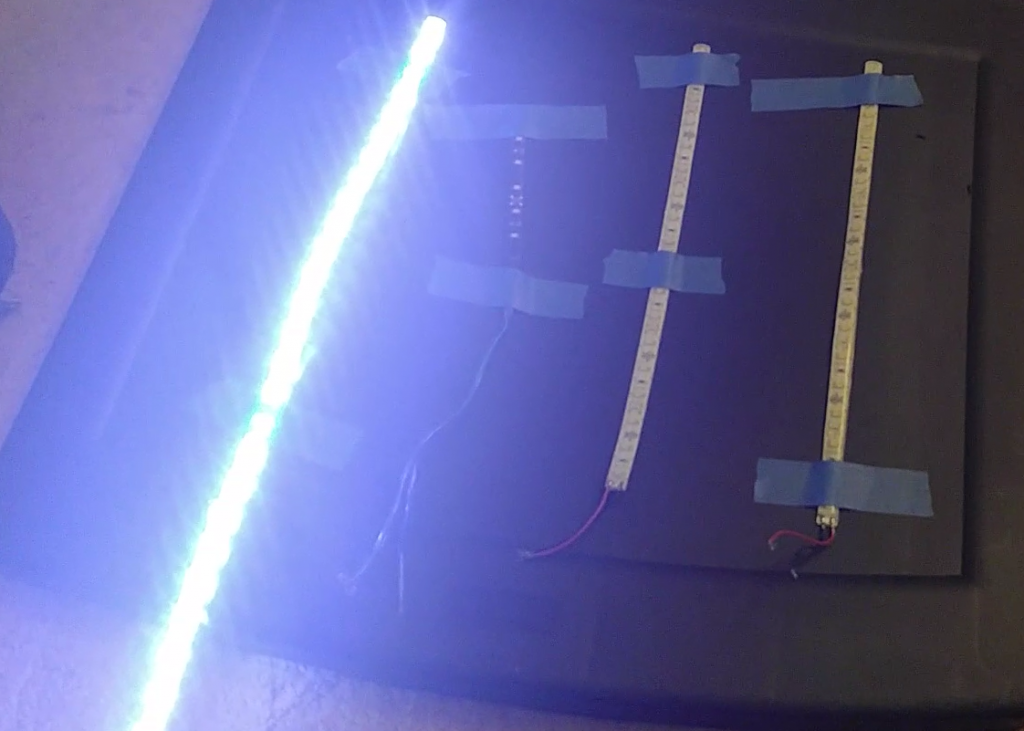
Now it was time for soldering. I soldered the strips in series with power coming in from the bottom left corner. I just attached very short wires between the positive (+) and negative (-) contact on each strip and covered with liquid electrical tape for extra protection. I connected a 12 volt power supply I had laying around to the beginning of the series to test all of the connections.

Lastly, I drilled a hole in the mount that would allow the entire unit to be easily added or removed from my tripod and this is the final result.
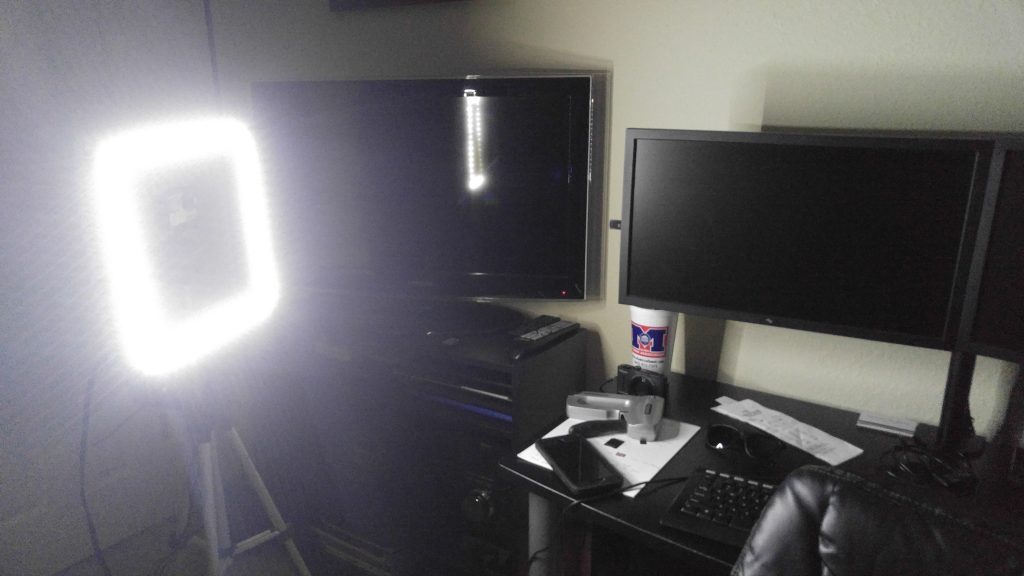
There are 15 LEDs on each side giving a total of 60 LEDs total. As you can see in the image below this is plenty bright for what I need and even gives a significant amount of illumination to the wall a few feet behind me. The total cost of the parts used for this project were about $20 which is considerably less than I would have spent if I would have just purchased one of these.

Since this system runs on 12 volts, I will be adding a battery to it very soon to make it portable. The good thing about 12 volt electronics is that I can buy a battery pack that holds 8 AA or AAA for about $1 and have the power I need. AA and AAA batteries give off 1.5 volts so when you add 8 of them together you get 12 volts. Overall, I’m very pleased with this project. I’d say 1 hour to save 100 bucks is always a good deal!
LEDs used: Superbrightleds.com – Outdoor LED Strip Lights – Weatherproof 12V